Essential Guidelines for Processing Phenolic Laminate Boards: Expert Techniques and Tips
Phenolic laminate board, also known as high-pressure laminate board, HPL compact laminate, compact phenolic board, or phenolic resin board, is widely used in laboratory countertops, toilet partitions, lockers, wall panels, furniture, medical worktops, school desks, public facilities, and commercial interiors. It is known for high density, strong durability, impact resistance, moisture resistance, fire-resistant options, chemical resistance, and long service life.
Because phenolic laminate board is hard, dense, and abrasive to tools, it cannot be processed like ordinary MDF, plywood, or particleboard. Cutting, drilling, routing, edge finishing, splicing, screw fixing, hinge installation, and cleaning all require suitable tools, stable support, correct speed control, dust extraction, and careful workmanship.
This guide explains the essential processing techniques for phenolic laminate boards, including accurate cutting, CNC machining, hole drilling, special-shaped edge processing, sanding, polishing, adhesive splicing, screw connections, concealed hinge installation, defect prevention, final cleaning, and maintenance.
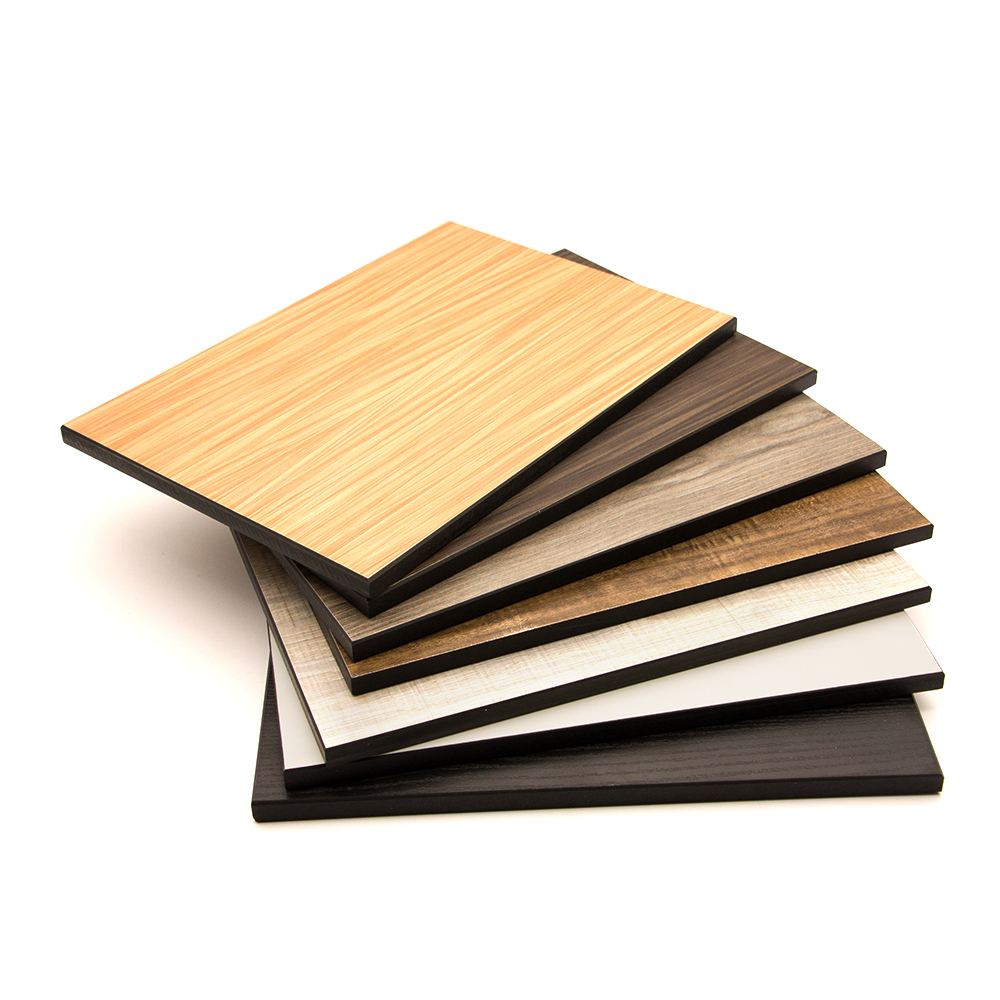
Understanding Phenolic Laminate Board Characteristics
Phenolic laminate boards are made from multiple layers of kraft paper impregnated with phenolic resin and pressed under high temperature and high pressure. This process creates a dense, non-porous, rigid, and self-supporting board with strong resistance to impact, moisture, wear, cleaning, and many demanding interior conditions.
The same properties that make phenolic laminate boards durable also make them more difficult to process. The material is hard, heavy, and tool-wearing. Poor processing can cause edge chipping, cracks, delamination, rough edges, oversized holes, screw failure, hinge damage, visible machining marks, and weak joints.
Processing Overview for Phenolic Laminate Boards
| Processing Step | Recommended Method | Key Risk to Avoid |
| Cutting | Straight-line saw, panel saw, CNC saw, carbide-tipped or diamond tools | Edge chipping, cracking, overheating, inaccurate dimensions |
| Drilling | Sharp drill bits, stable backing board, controlled feed pressure | Breakout, oversized holes, heat buildup, edge cracks |
| Routing | Portable router, CNC router, sharp carbide or diamond cutters | Ripple marks, burning, uneven edges, tool wear |
| Edge Finishing | Chamfering, sanding, polishing, silicone-free oil or wax when suitable | Sharp edges, rough finish, visible saw marks, moisture entry |
| Splicing | Full adhesive coverage, clamping, accurate joint preparation | Weak joints, cracks, gaps, adhesive failure |
| Screw Fixing | Pre-drilling, correct pilot hole, suitable screw depth, adhesive reinforcement | Bulging, splitting, loose screws, edge cracking |
| Hinge Installation | Controlled cup-hole depth, remaining thickness control, screw-hole reinforcement | Board cracking, hinge loosening, surface bulging |
1. Accurate Cutting Techniques for Phenolic Laminate Panels
Use Straight-Line Sawing for Clean Cuts
Straight-line sawing is the basic processing method for phenolic laminate boards. For accurate cutting, mark the dimensions clearly before sawing and use templates for standard-sized workpieces. Templates improve repeatability, reduce measuring errors, and help maintain consistent panel size during batch production.
Use a panel saw, straight-line saw, table saw, or CNC cutting equipment for stable cutting.
Use carbide-tipped or diamond-tipped blades suitable for HPL compact laminate.
Make sure the board is fully supported to reduce vibration and breakout.
Keep cutting tools sharp to reduce chipping, overheating, and edge damage.
Use dust extraction because phenolic laminate cutting produces fine dust.
Control the Cutting Speed
Cutting speed must be controlled according to board thickness, tool type, machine stability, blade condition, and required edge quality. In many workshop applications, a controlled feed speed of around 3–4 meters per minute is used to reduce edge chipping and tool overheating.
Excessive cutting speed may cause edge chipping, cracking, burning, blade wear, tool vibration, and rejected materials. Too slow a feed speed can also increase heat buildup and shorten tool life. The correct speed should be verified through sample cutting before mass production.
How to Reduce Chipping When Cutting Phenolic Laminate
Use a sharp blade with suitable tooth geometry.
Use scoring blades or zero-clearance support when available.
Clamp the board firmly and support the underside.
Avoid vibration, sudden feeding, and forced cutting.
Leave a small trimming allowance for final routing when high edge quality is required.
2. Precision Hole Drilling and Openings
Drilling phenolic laminate boards requires stable support, sharp tools, and controlled feed pressure. Poor drilling can create breakout on the underside, surface cracks, oversized holes, heat damage, and weak screw connections.
Best Practices for Drilling Phenolic Laminate Boards
Use drill bits suitable for compact laminate or hard plastic sheet materials.
Place the board on a stable backing board to reduce breakout on the underside.
Drill from the decorative side where appearance is most important.
Use controlled feed pressure and avoid forcing the drill.
Lift the drill periodically to clear chips and reduce heat buildup.
For batch production, use CNC drilling to improve repeatability and hole accuracy.
Creating Openings and Cutouts
For curved openings, sink cutouts, equipment holes, switch openings, ventilation holes, and special-shaped cutouts, use CNC machining, routers, or a jigsaw with a fine-tooth blade. Internal corners should be rounded rather than sharp to reduce stress concentration and cracking risk.
Avoid sharp internal corners in cutouts.
Use a suitable radius at inside corners.
Support the board close to the cutting area.
Finish cutout edges by routing, sanding, and chamfering where required.
3. Processing Special-Shaped Edges Efficiently
Mark and Cut with Templates
For non-standard panels, curved edges, shaped furniture parts, laboratory worktops, toilet partition components, door panels, and custom wall panels, accurate templates can improve production efficiency and consistency.
Clearly outline the required size, shape, radius, hole positions, and edge direction before cutting.
Use jigs or templates for batch production.
Confirm whether the decorative surface direction or grain direction must be aligned.
Mark all holes, grooves, screw positions, and hinge positions before machining.
Smooth Edge Finishing with a Router
For visible edges, routing or milling is usually required after sawing. Use a portable router, spindle moulder, or CNC router with suitable carbide or diamond tooling. The cutter must be sharp and the board must be firmly supported to prevent vibration marks.
Ensure the cutter length is suitable for the board thickness.
Start trimming from the top edge and move steadily downward where appropriate.
Maintain stable movement and avoid shaking the router.
For manual routing, use guides, templates, and clamps for better control.
A processing speed of about 2 meters per minute may be used as a practical workshop reference, then adjusted by tool and board condition.
Sudden movements can create ripple marks and increase sanding work. When the edge is a visible design surface, trial processing should be done first to confirm cutting quality and edge appearance.
4. Sanding and Polishing Techniques
Sanding Sequence for a Clean Edge Finish
After cutting and routing, sanding improves the edge appearance and removes tool marks. Only the edge should be sanded unless the manufacturer specifically allows surface sanding. Sanding the decorative surface may damage the finish.
Begin with 80-grit sandpaper for rough edge marks when needed.
Progress to 220-grit for smoother edge finishing.
Use 320-grit or finer for a more refined visible edge.
Chamfer sharp edges slightly to improve safety and reduce chipping risk.
Remove dust after sanding before polishing or installation.
Polishing for Smooth, Decorative Edges
For furniture, laboratory countertops, partitions, lockers, and exposed panel edges, polishing can improve the visual quality of the phenolic compact laminate core. A thin layer of suitable polishing wax or silicone-free furniture oil may be applied when compatible with the product and project requirement.
Apply a thin layer of suitable polishing wax or approved finishing oil using a soft cotton cloth.
Allow it to dry according to the product instructions.
Wipe and buff the edge with a clean cloth until the edge becomes smooth and visually consistent.
Repeat the process if a higher gloss or deeper edge color is required.
5. Strong and Seamless Panel Splicing
Proper splicing is critical when phenolic laminate boards are used for long countertops, wall panels, furniture assemblies, laboratory benches, partitions, and custom structures. Poor joints can cause visible gaps, cracks, water entry, adhesive failure, and weak structural performance.
Adhesive Application for Phenolic Laminate Joints
Clean and dry all bonding surfaces before applying adhesive.
Use adhesive compatible with phenolic compact laminate and project conditions.
Apply enough adhesive for full joint coverage; a practical reference range may be 2.5–3.0g/cm² where suitable for the adhesive system.
Clamp the panels tightly for at least 30 minutes or according to adhesive curing instructions.
For vertical joints, increase bonding surface area by using suitable joint profiles or structural design.
If cracks or gaps appear at the joint, check whether the panel edges were properly prepared, whether adhesive coverage was sufficient, whether clamping pressure was uniform, and whether the smooth side or finished side was oriented correctly.
6. Secure Screw Connections
Screw fixing is common for partitions, furniture, lockers, wall panels, brackets, hinges, and support hardware. Because phenolic laminate board is dense and rigid, screws should not be forced directly into the material without preparation.
Pre-drill pilot holes before inserting screws.
Use a drill bit slightly smaller than the screw diameter where a strong bite is required.
Add adhesive to the drilled hole before inserting the screw when additional holding strength is needed.
Ensure screws are embedded at least 5mm into the board where the design allows firm attachment.
Avoid overtightening screws because this may cause bulging, splitting, or edge cracking.
For frequent disassembly or heavy-duty load, use metal inserts or reinforced fixing points.
7. Installing Cup-Style Concealed Hinges
Phenolic laminate boards require careful hinge installation, especially for doors, cabinets, lockers, laboratory furniture, toilet cubicle doors, and storage systems. Incorrect hinge drilling may weaken the board or cause surface bulging.
Mark hinge positions accurately before drilling.
Maintain at least 3mm of remaining board thickness after drilling the hinge cup hole.
Apply adhesive to the bottom of the hinge hole and screw holes when additional reinforcement is required.
Use suitable screws and avoid overtightening.
For heavy doors, use reinforced hinge zones or hardware designed for compact laminate.
8. CNC Processing for Batch Production
For large projects, CNC processing improves accuracy, repeatability, and efficiency. CNC cutting, drilling, grooving, routing, hinge machining, lock machining, and edge profiling are useful for furniture factories, partition manufacturers, laboratory furniture suppliers, and wall panel processors.
Use CAD drawings and CNC programs to reduce manual measurement errors.
Confirm tool path, feed speed, spindle speed, and tool type before mass production.
Run a sample panel first to verify hole positions, edge quality, and dimensions.
Label processed panels clearly for installation sequence and project tracking.
9. Final Cleaning and Maintenance Tips
Removing Stains Without Damaging the Surface
After processing and installation, phenolic laminate boards should be cleaned carefully to remove dust, adhesive residue, fingerprints, and light stains. Correct cleaning protects the decorative surface and preserves the board’s long-term appearance.
For light dirt or spots, clean with soap or general detergent mixed with water.
Use a soft cloth rather than abrasive pads or steel wool.
For stubborn stains, use only manufacturer-approved cleaning agents.
Avoid excessive force, sharp blades, and harsh scraping on the decorative surface.
Remove processing dust from holes, grooves, edges, and joints before final assembly.
Ongoing Maintenance After Installation
Clean surfaces regularly with mild detergent and water.
Avoid direct cutting on the finished surface.
Inspect edges, joints, screws, hinges, and sealants regularly.
Repair damaged joints or loose hardware promptly.
Protect exposed edges from prolonged moisture exposure where required.
Common Processing Defects and How to Prevent Them
| Defect | Possible Cause | Prevention Method |
| Edge Chipping | Dull blade, poor support, excessive feed speed, vibration | Use sharp carbide or diamond tools, stable support, scoring blade, and correct feed speed |
| Cracking Around Holes | Wrong drill bit, excessive pressure, no backing board, sharp internal corners | Use suitable drill bits, support the underside, control feed pressure, and round internal corners |
| Rough Edge Finish | No routing after sawing, tool marks, incorrect sanding sequence | Route or mill visible edges, sand progressively, and polish where required |
| Loose Screws | No pilot hole, incorrect screw size, insufficient embedment, repeated loading | Pre-drill, use correct screw depth, add adhesive, or use inserts for heavy-duty fixing |
| Joint Cracking | Insufficient adhesive, poor clamping, contaminated bonding surface | Clean surfaces, apply full adhesive coverage, clamp evenly, and allow proper curing time |
| Surface Scratches | Dragging panels, abrasive cleaning, poor handling | Use protective pads, avoid dragging, clean with soft cloth, and protect finished surfaces |
Safety Guidelines for Processing Phenolic Laminate Boards
Processing phenolic laminate boards creates dust, noise, sharp edges, and tool wear. Workshop safety should be part of every cutting, drilling, routing, sanding, and polishing process.
Use dust extraction when cutting, drilling, routing, or sanding.
Wear eye protection, dust mask or respirator, gloves, and hearing protection where required.
Clamp panels securely before machining.
Keep hands away from cutting lines and rotating tools.
Use appropriate lifting methods for large or heavy panels.
Remove dust and chips from the working area regularly to improve safety and accuracy.
Quality Control Checklist Before Delivery or Installation
| Inspection Item | What to Check | Acceptance Focus |
| Panel Dimensions | Length, width, thickness, squareness, diagonal difference | Matches drawing tolerance and installation requirement |
| Cutting Quality | Straightness, edge chipping, saw marks, cracks | Clean and consistent cut with no serious defects |
| Hole Accuracy | Hole diameter, location, depth, backside breakout | Hardware fits correctly and holes are clean |
| Edge Finish | Routed edge, sanding quality, chamfer, polishing, exposed core appearance | Smooth, safe, and visually consistent edge |
| Joint and Splicing | Adhesive coverage, gap, alignment, clamping marks, crack risk | Strong joint with clean appearance |
| Surface Protection | Scratches, stains, adhesive residue, dust, packaging damage | Surface is clean, protected, and ready for installation |
Conclusion: Mastering Phenolic Laminate Board Processing
Working with phenolic laminate board requires precision, the right tools, stable support, speed control, dust extraction, and strict processing discipline. From accurate cutting and smooth edge finishing to proper drilling, screw fixing, hinge installation, splicing, and cleaning, every step affects final product quality.
Whether you are a manufacturer, contractor, furniture maker, laboratory furniture supplier, restroom partition producer, or designer, understanding these processing essentials helps unlock the full potential of phenolic laminate boards in both functional and decorative applications.
FAQ About Processing Phenolic Laminate Boards
What tools are best for cutting phenolic laminate boards?
Carbide-tipped or diamond-tipped blades are commonly recommended for cutting phenolic laminate boards. A stable panel saw, straight-line saw, table saw, or CNC saw can help achieve cleaner cuts, reduce chipping, and improve dimensional accuracy.
How do you prevent chipping when cutting phenolic laminate?
Use sharp blades, stable support, correct feed speed, scoring blades or zero-clearance inserts where available, and avoid vibration. For visible edges, leave a small trimming allowance and finish the edge with routing, sanding, and chamfering.
Can phenolic laminate boards be drilled?
Yes. Phenolic laminate boards can be drilled with suitable drill bits and stable backing support. Drill from the decorative side when appearance is important, clear chips frequently, and control feed pressure to reduce heat buildup and breakout.
How should phenolic laminate edges be finished?
Visible phenolic laminate edges should usually be routed or milled, then sanded through suitable grit levels and lightly chamfered. For better appearance, compatible polishing wax or silicone-free furniture oil may be used when approved for the product.
Can screws be used in phenolic laminate boards?
Yes. Screws can be used, but pilot holes should be pre-drilled. The screw size, embedment depth, edge distance, and tightening force must be controlled. For heavy-duty or repeated-use connections, inserts or reinforced fixing points may be required.
How deep should concealed hinge cup holes be in phenolic laminate boards?
The hinge cup hole depth depends on the board thickness and hinge type. A practical rule is to maintain at least 3mm of remaining board thickness after drilling to reduce the risk of surface damage, bulging, or cracking.
Is CNC machining recommended for phenolic laminate boards?
Yes. CNC machining is recommended for batch production, complex shapes, accurate holes, grooves, hinge positions, lock cutouts, and repeatable panel sizes. It improves processing accuracy and reduces manual error.
What causes cracks in phenolic laminate during processing?
Cracks may be caused by dull tools, excessive feed pressure, unsupported drilling, sharp internal corners, overtightened screws, poor clamping, excessive heat, or forcing the board during installation. Proper tools, support, and speed control reduce cracking risk.
How do you clean phenolic laminate boards after processing?
Remove dust and chips first, then clean with mild detergent and water using a soft cloth. Avoid abrasive pads, steel wool, sharp scraping tools, and unapproved strong solvents that may damage the decorative surface.
What should buyers check in processed phenolic laminate parts?
Buyers should check dimensions, edge quality, hole accuracy, surface scratches, cracks, chipping, joint quality, screw positions, hinge fit, polishing quality, packaging protection, and whether the processed parts match the approved drawings.
 Русский
 English
 العربية
 Français
 Español
 Português
 Deutsch
 italiano
 日本語
日本語 한국어
한국어 Nederlands
 Tiếng Việt
 ไทย
ไทย Polski
 Türkçe
 አማርኛ
አማርኛ Bahasa Melayu
 தமிழ்
தமிழ் Filipino
 Bahasa Indonesia
 magyar
 Română
 Монгол
 қазақ
қазақ Српски
 हिन्दी
 فارسی
فارسی Kiswahili
 Slovenčina
 Slovenščina
 Svenska
 українська
 Ελληνικά
 Suomi
Suomi Հայերեն
 עברית
עברית اردو
اردو Shqip
Shqip বাংলা
বাংলা Hrvatski
 Afrikaans
 Māori
Māori සිංහල
සිංහල Oʻzbekcha
 latviešu
 Беларуская мова
 Bosanski
 Български
 ქართული
 Lietuvių
 Malti
Malti Runasimi